Help center/VRAC+
User guide
VRAC+
Everything you need to install VRAC+, turn any sound into a drum kit and export it to your DAW.
Welcome
Meet VRAC+
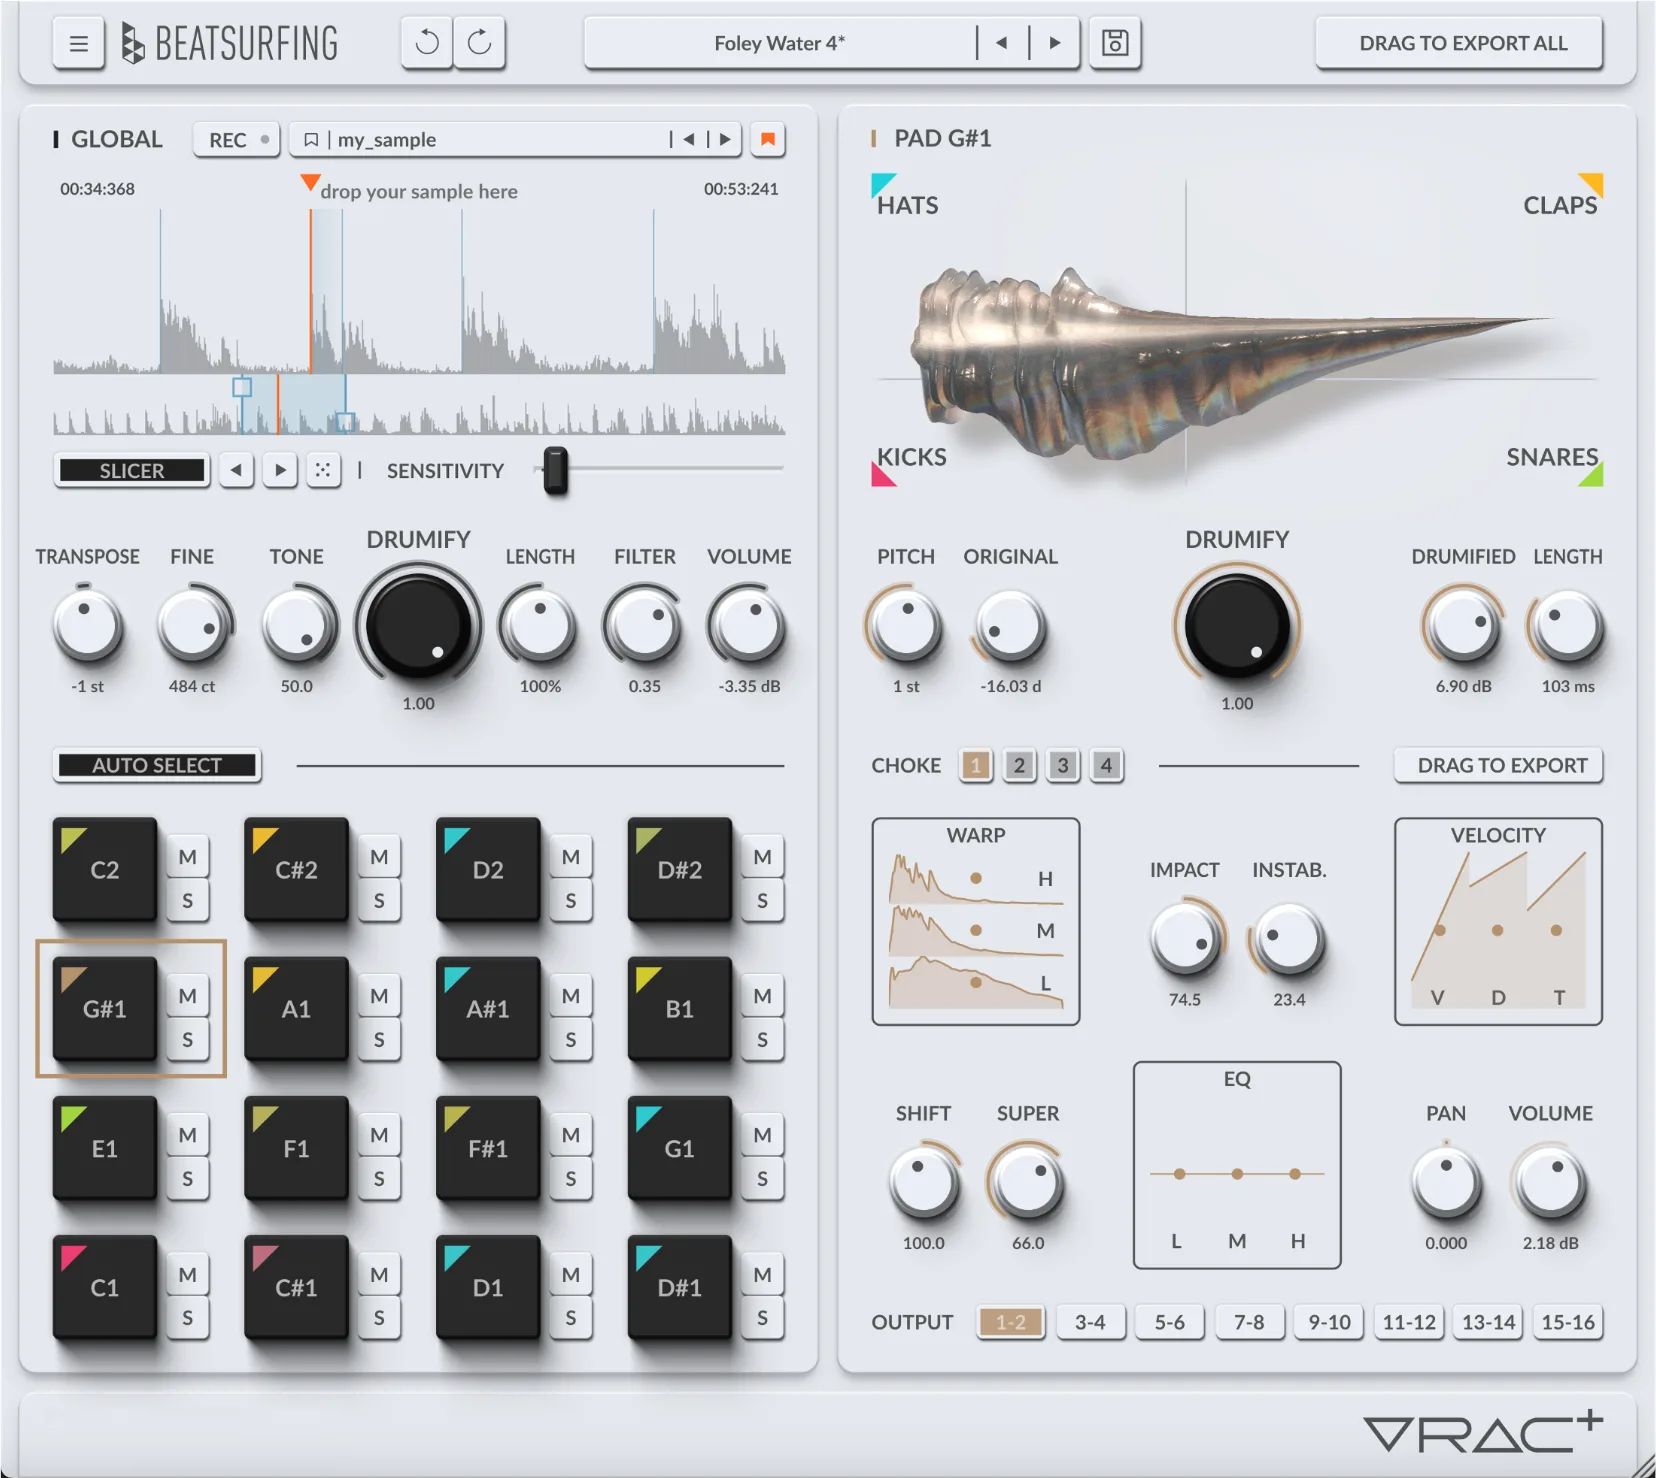
VRAC+ is a sample-based drum machine that turns any sound into a fully featured drum kit. Drop a sample, set the sample start and shape each hit by morphing between kick, snare, hat and clap models.
VRAC+ turns raw audio into punchy, original beats built for the stage, the studio, or both. Drumify any sound: one sound, one drum kit.
Key features
- Drumify any sample
- Drop your own sounds, record your DAW, or browse samples recorded especially for VRAC+, from machine ASMR to everyday noises captured in the studio.
- Auto slicing
- Let the slicer find every hit in your sample, then jump between them on the fly and land on new percussive moments every time.
- Drumification models
- Morph between a large bank of kick, snare, hat and clap models to sculpt every hit.
- Sound design
- Get under the hood and edit each model's shape and response to build drums that are yours.
- Global shaping
- Shape the entire kit with global controls.
Why VRAC+
- Instant kits: original drum kits in minutes, not endless sample browsing.
- Raw-to-drums: turn raw audio into playable, expressive drum material.
- Morphing models: morph between a large bank of kicks, snares, hats and claps to shape every hit.
- Craft your own sound by fine-tuning tone, texture and dynamics.
Where to start
Welcome
VRAC vs VRAC+
VRAC is a free and easy way to create quick drum kits from any sample. VRAC+ gives you deeper access to both the performance and the sound design behind it.
The table below lists the differences between the two versions.
| Feature | VRAC | VRAC+ |
|---|---|---|
| Sound sources | ||
| Record from your DAW | – | ✓ |
| Sample library: current folder, imported, recorded | – | ✓ |
| Bookmark your samples | – | ✓ |
| Sample start | ||
| Auto Slicer with sensitivity control | – | ✓ |
| Jump to previous, next or random slice | – | ✓ |
| Add, move and delete slices | – | ✓ |
| Pads | ||
| Pads | 8 | 16 |
| Warp: 3-band dynamic reshaping | – | ✓ |
| Impact: transient shaping | – | ✓ |
| Instability: randomness at each hit | – | ✓ |
| Tone Shift: spectral shifting | – | ✓ |
| Super: saturation and stereo width | – | ✓ |
| 3-band EQ | – | ✓ |
| Velocity sensitivity | Volume | Volume, Length, Tone Shift |
| Global controls | ||
| Global Tone Shift | – | ✓ |
| Global Filter: DJ-style low-pass and high-pass | – | ✓ |
| Mix and export | ||
| Audio outputs | 1 stereo pair | 8 stereo pairs |
| Drag to export all: the whole kit at once | – | ✓ |
Started projects in VRAC? You can bring them into VRAC+: see Settings.
Quick start
System requirements
VRAC+ runs as a plugin in your DAW on Windows and macOS.
Windows
- Windows 10 or higher
- 2 GHz Pentium IV processor or equivalent
- A host that supports 32-bit or 64-bit VST
- Formats: VST, VST3, AAX
macOS
- macOS 10.13 High Sierra or later
- Intel or Apple Silicon processor
- A host application that supports 64-bit VST or AudioUnit
- Formats: AU, VST, VST3, AAX
Quick start
Installation
Download the installer for your system, run it, then enter your license code the first time you open VRAC+.
Windows
- Download the VRAC+_vX.X.X.exe installer file.
- Install to your preferred plugin folder.
- On first launch, enter your license code.
macOS
- Download the VRAC+_vX.X.X.pkg installer file.
- Follow the steps to install. The plugins are installed to the default location: /Library/Audio/PlugIns.
- On first launch, enter your license code.
After purchasing VRAC+, your license key appears on your Licenses page: beatsurfing.com/my-account/license-keys.
Quick start
Activating & deactivating the license
Each license you buy lets you activate the plugin on 3 computers at a time.
If you need to run it on a 4th machine, first deactivate the plugin's license on one of your machines. You do this from the Settings menu, under Manage your license (see Settings).
When a license is deactivated
Your plugin is still usable, but in a frozen state: your existing sessions will load the plugin and its parameters in their last saved state. However, you won't be able to access the user interface to tweak its parameters.
Using VRAC+
Start with a sound
There are several ways to add raw audio in VRAC+: drop a file, record from your DAW, or pick a sample from the library.
Drop an audio file
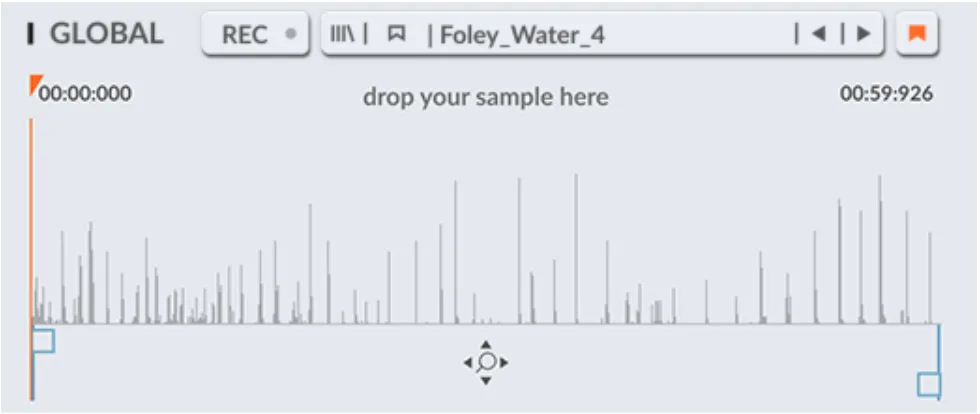
Drop an audio file on the timeline zone. Accepted file types: WAV, AIF/AIFF, MP3, FLAC, OGG.
You can import a short one-shot sample ready to be processed, or a longer file that will be trimmed to a maximum of 1 hour.
Record from your DAW
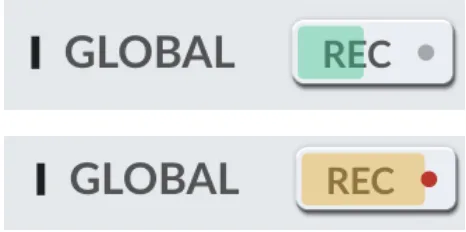
Record any audio from your DAW, from a track or a live input, by routing a track to the sidechain or audio input of VRAC+. Refer to your DAW's user manual for the routing procedure. You can also find useful information in our Help center.
Once the routing is set, hit REC to start, then hit it again to stop recording.
Recordings are stored in your user folder. You can edit the path in the Settings menu.
Organize your sounds

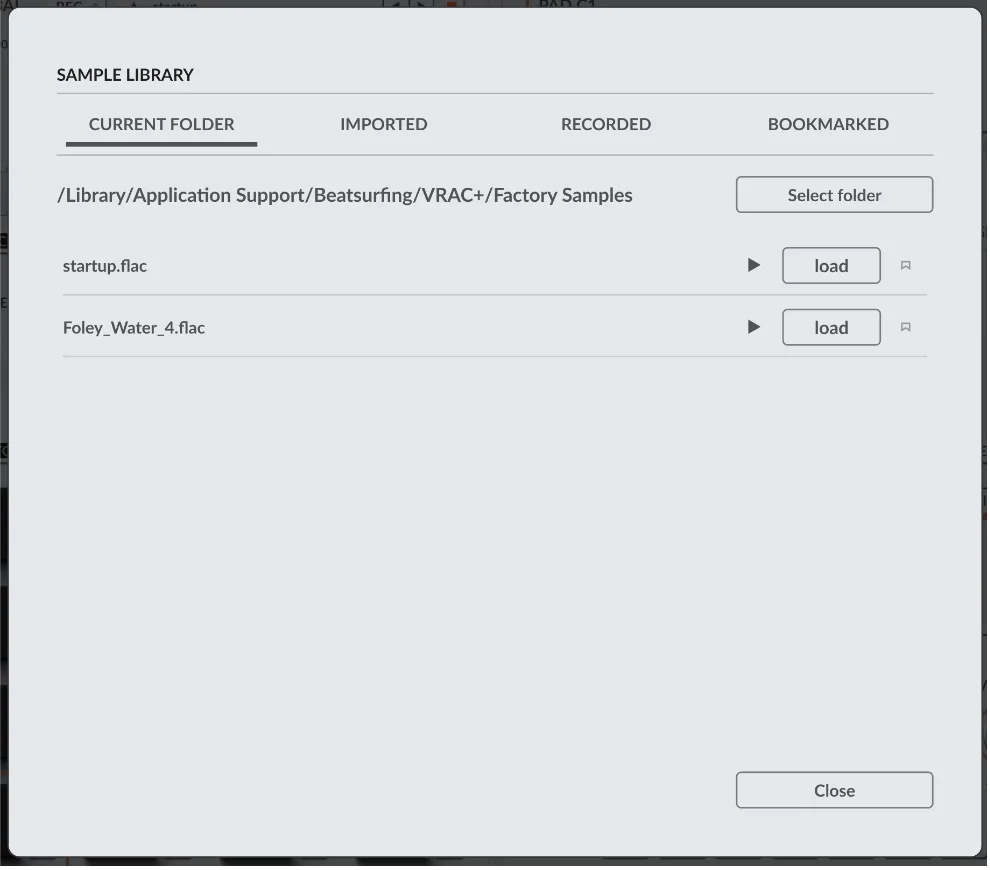
From the main window, navigate to the other samples in the list. Use the bookmark icon to find them easily. Click the sample name to open the library view, which displays several lists to browse from:
- Current folder: all other samples in the same folder as the currently loaded one. Each sample in the list can be added to the bookmark list, or copied into the user imported samples folder. Use the Select folder button to access another folder.
- Imported: samples generally linked to factory presets or imported preset packs. You will find a curated list of samples recorded especially for VRAC+, alongside all samples imported from preset packs. Add your own samples with the ADD button: they are copied into your user imported samples folder, whose path you can set in the Settings menu.
- Recorded: all samples recorded with the record input of VRAC+. You can set the path of this folder in the Settings menu.
- Bookmarked: from any of the previous lists or from the main window, click the bookmark icon to add a sample here and find it later.
Browse the presets library

Find a collection of ready-to-work audio sources curated by Beatsurfing to get you started, and save your own (see Presets).
Using VRAC+
Auto-slicing & sample start
Choose the exact point in your audio that becomes the drum kit, by hand or with the slicer.
Set the sample start manually
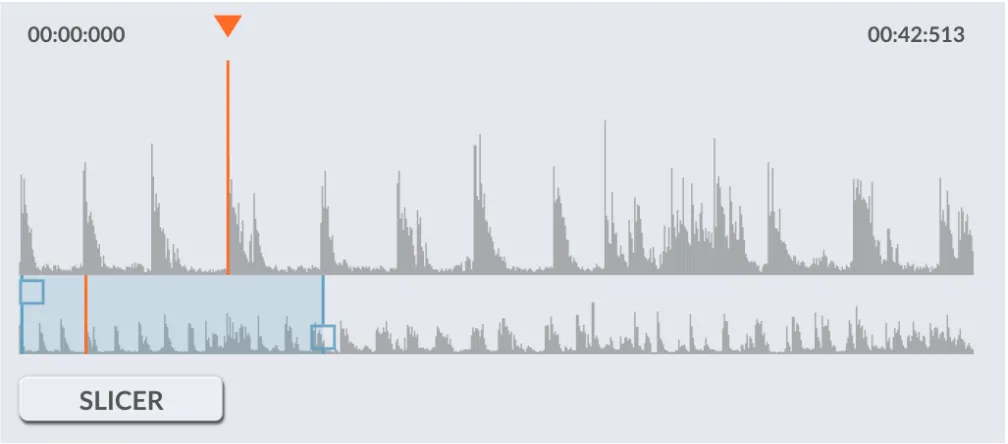
Drag the line to set the start of the sound you want to turn into a drum kit.
Grab the zoom rectangles to adjust the zoom view.
Use the mouse wheel over the zoom view to change the zoom level.
Auto slicing
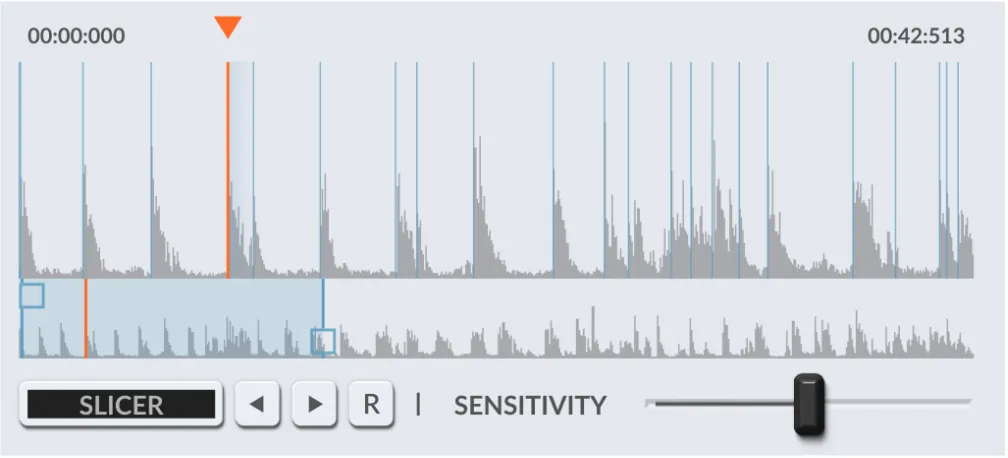
Turn on the Slicer button to magnetize the sample start to slices. Slices are detected automatically, with a density set by the Sensitivity fader.
Use the arrows to jump to the previous or next slice, or R to jump to a random one.
Edit slices
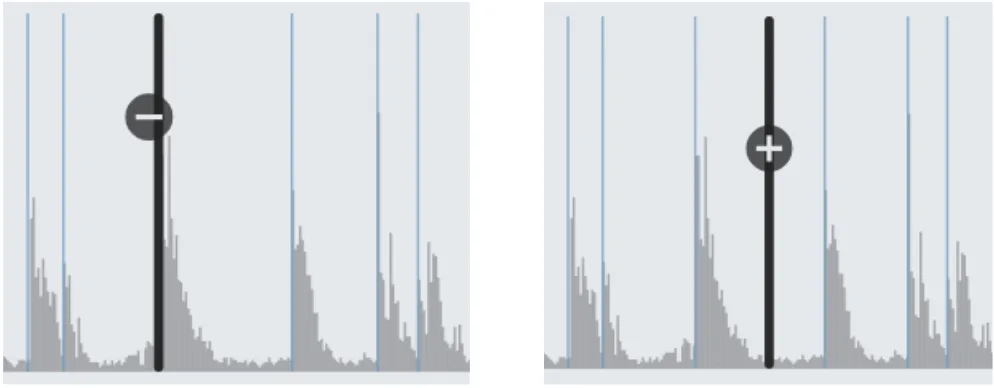
Grab a slice line to move it.
⌘ Cmd (Mac) or Ctrl (Windows) + click on a line deletes it. The same shortcut anywhere else adds a new slice.
Using VRAC+
Play your drum kit
The selected slice is processed into a 16-piece drum kit, ready to be loaded into the pads and performed.
Pads on screen
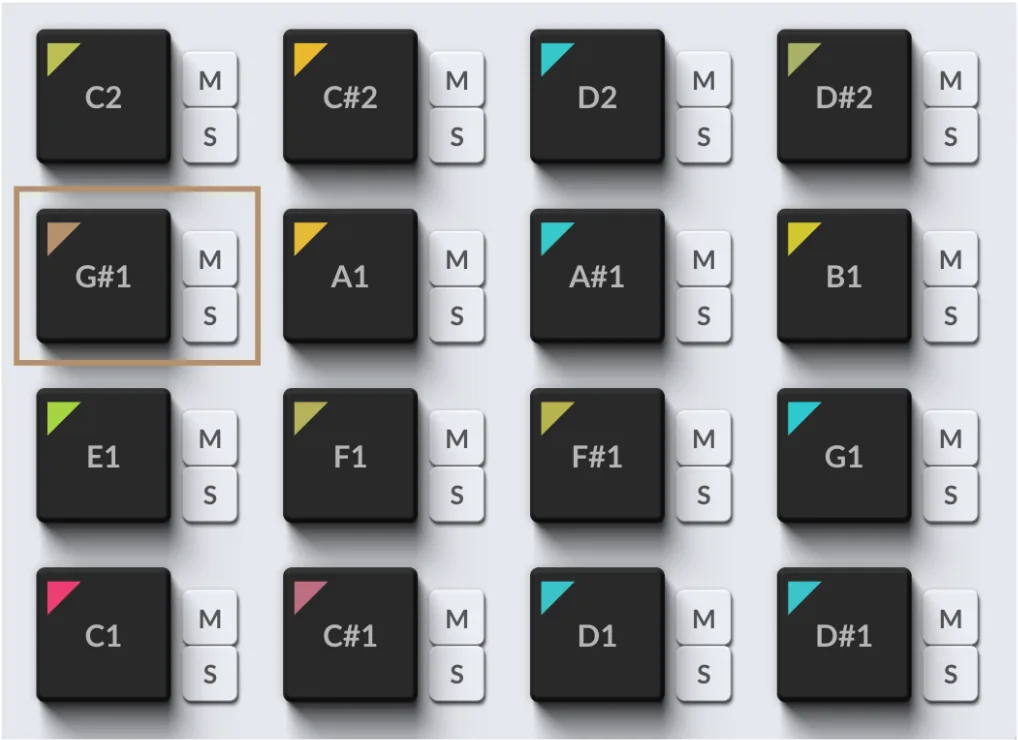
Click a pad to play its sound and display its settings.
MIDI
Each of the 16 pads is triggered when it receives a MIDI note. The default lowest note is C1 (36); you can change it in the Settings menu.
When VRAC+ receives MIDI notes outside the accepted range, a notification shows the expected range. You can turn this notification off in the Settings menu.
Follow: turn Auto Select on to display the settings of the pad you play from your MIDI controller.
Solo and mute
Use the M and S buttons to mute or solo pad sounds.
Shift + click to solo several pads.
Using VRAC+
Fine-tune your sound
VRAC+ has per-pad settings and global settings. This page covers the per-pad settings; the global ones are in Global controls.
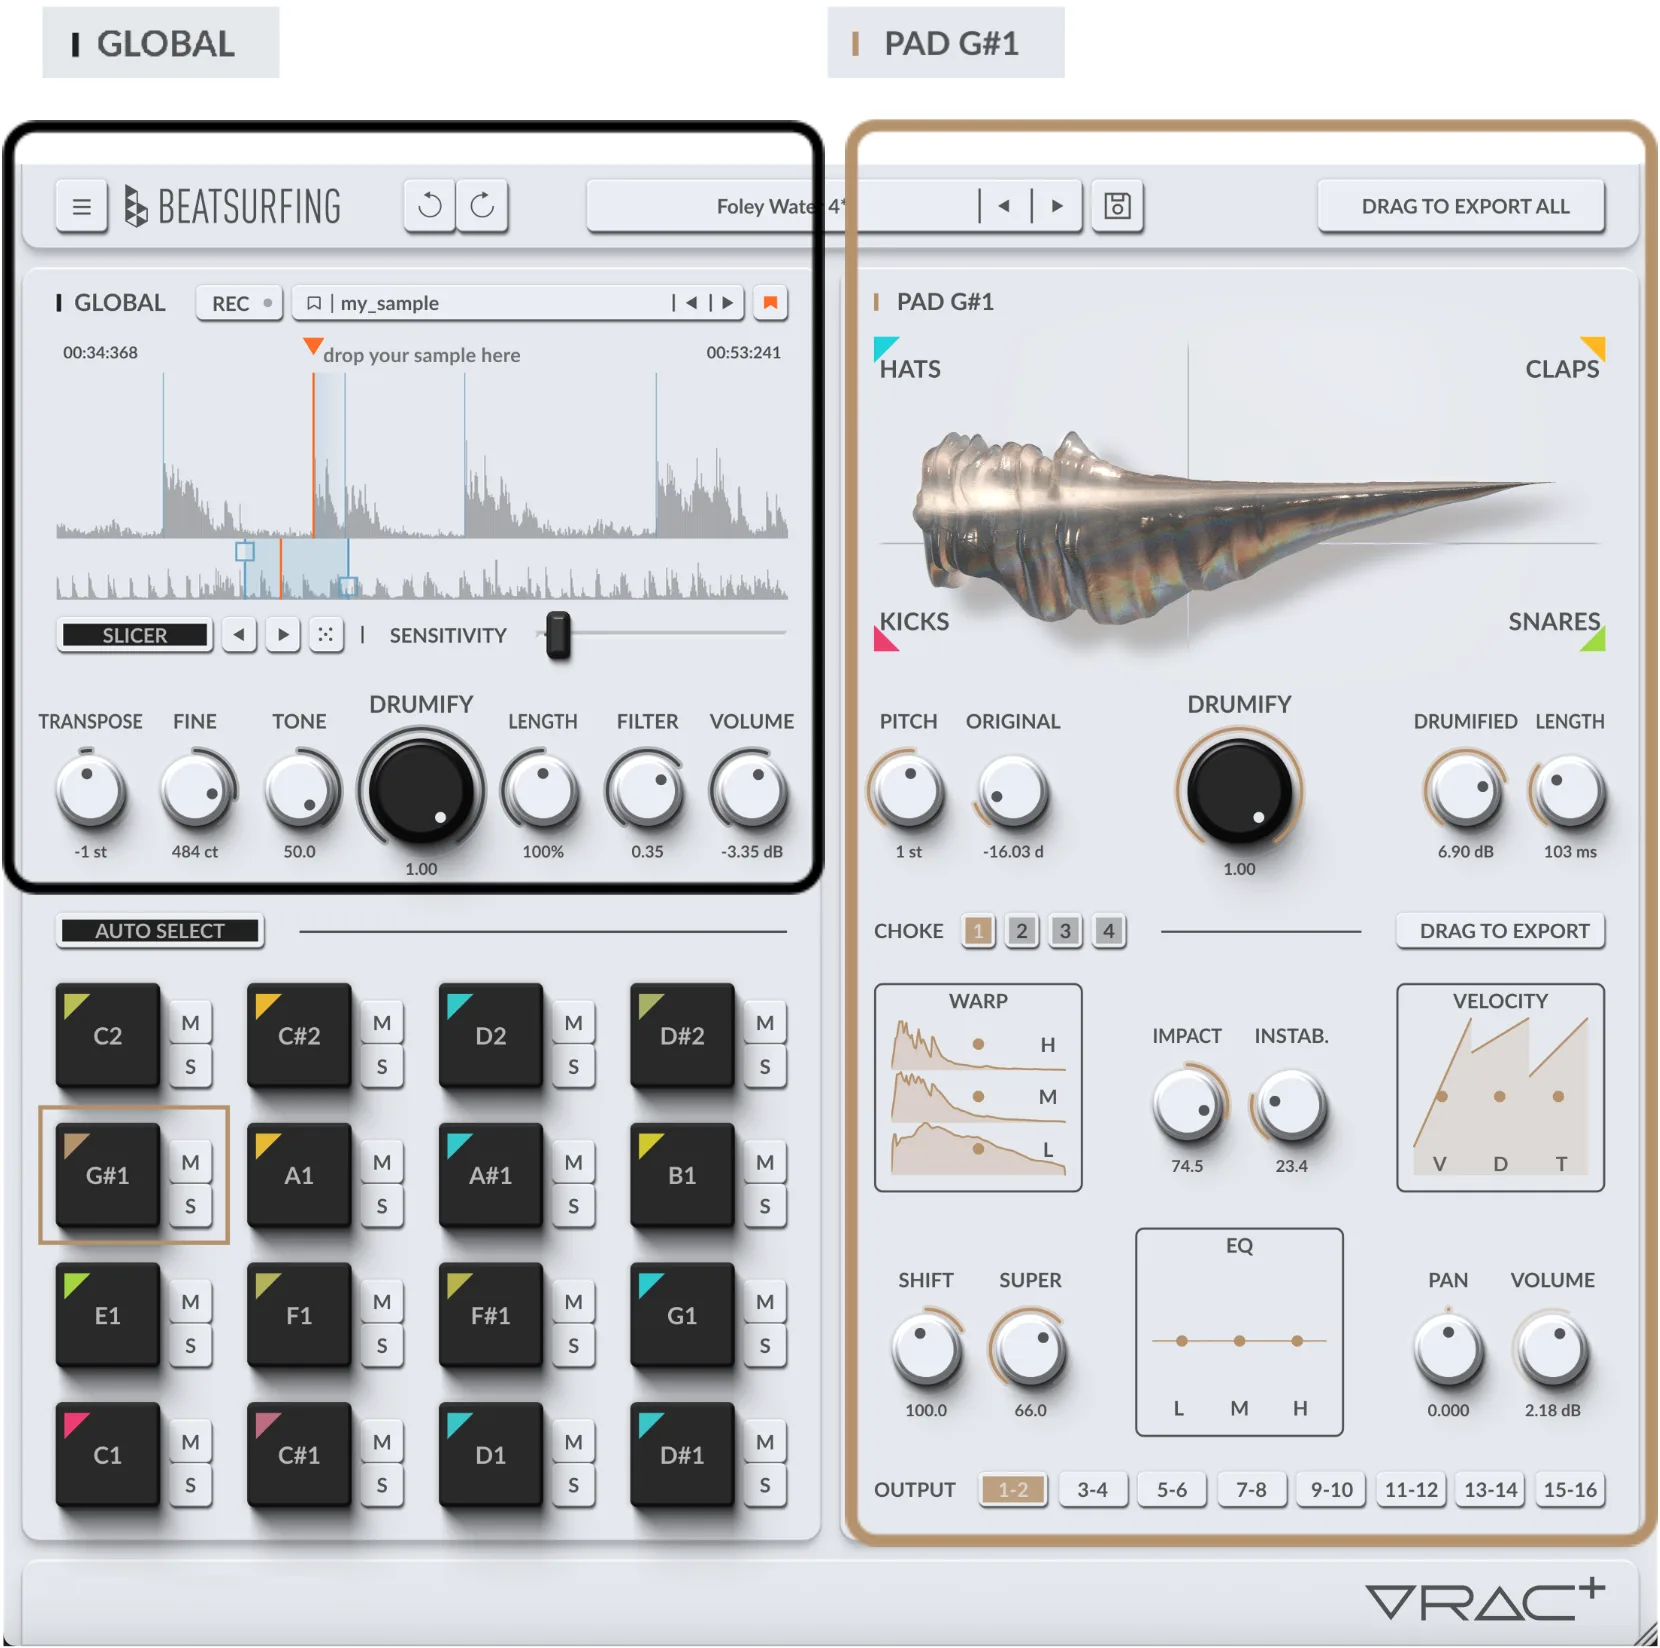
Select a pad to display its parameters. Pad settings are independent of the slice being processed, and are kept when you change the slice or the audio source.
Drumification Models map
Multiple Drumification Models are spread across an X-Y map, organized into 4 poles: kicks, snares, hats, claps.
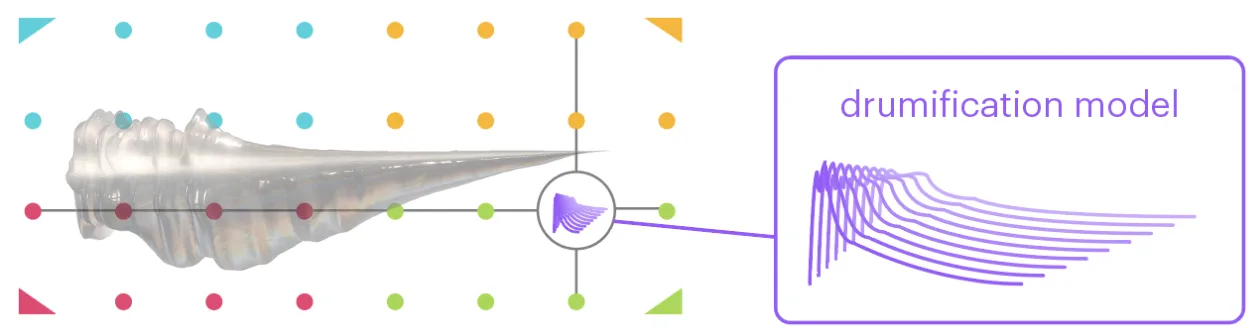
Drumification is a unique sample-shaping process. The Drumifier analyzes the dynamics of the incoming sample across the spectrum, then sculpts its spectral and dynamic content to match one of the many kick, snare, hat and clap models developed especially for VRAC+. These models can then be morphed together and reshaped with the advanced controls.
The shape on screen represents the current dynamic content of the sound played, revolving around its spectrum. Move the cursor around the map to morph between models.
Pad controls
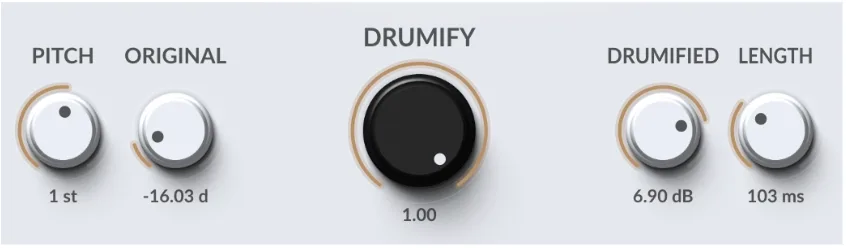
- Drumify
- Blend between the original sample and the drumification model.
- Original Gain
- Original audio level.
- Drumified Gain
- Drumified audio gain.
- Pitch
- Sample pitch in semitones, set by changing the sample's playback speed.
- Length
- Playback length.
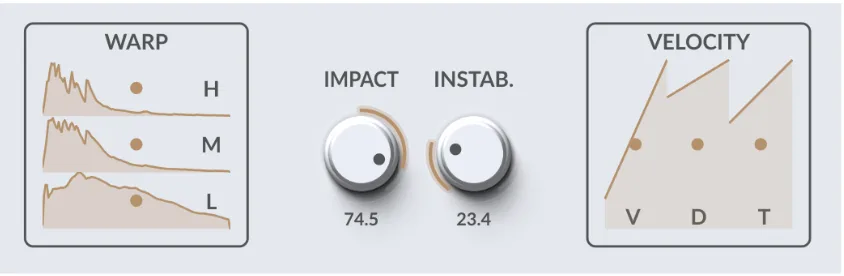
- Warp
- Reshapes the model's dynamic content across 3 bands. Low settings read through the model exponentially, concentrating the volume peak at the beginning. High settings read through it logarithmically, stretching the beginning and pushing the peaks toward the end.
- Impact
- Transient shaping of the sound.
- Instability
- Randomness of various parameters at each new hit.
- Velocity
- Lowers the setting when a lower velocity is received. Acts separately on the Volume (V), Length (D) and Tone Shift (T) parameters.
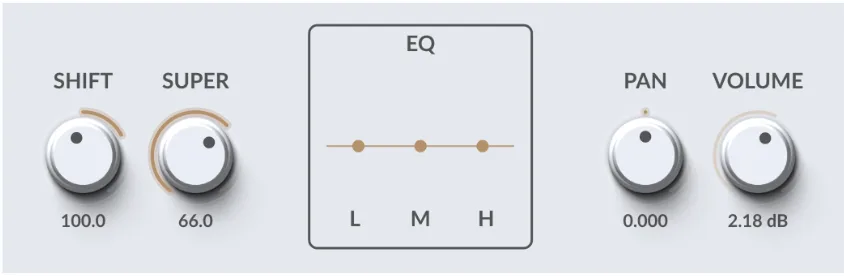
- Tone Shift
- Spectral shifting of the Drumifier model.
- Super
- Saturation and stereo width.
- EQ
- Low, mid and high frequency gain. Affects both the original audio and the Drumifier model.
- Pan
- Stereo placement of the pad in the output mix.
- Volume
- Level of the pad in the output mix.
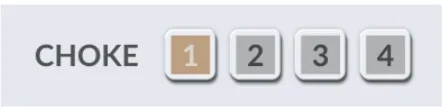
Choke groups
Pads in the same group choke each other on each new hit. Hover over the buttons to see which pads belong to the group.
Outputs
Pads can be routed and mixed through 8 pairs of audio outputs in your DAW.

Using VRAC+
Duplicate, copy & swap pads
Speed up sound design by sharing settings between pads and rearranging the kit.
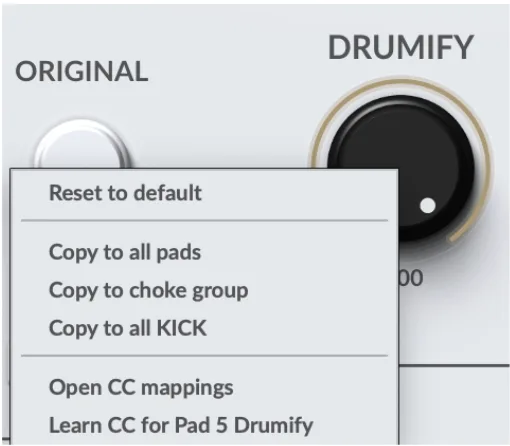
Duplicate a setting
Right-click any pad parameter to duplicate its value to:
- all 16 pads,
- all pads in the same choke group,
- all pads with a similar drumification model.
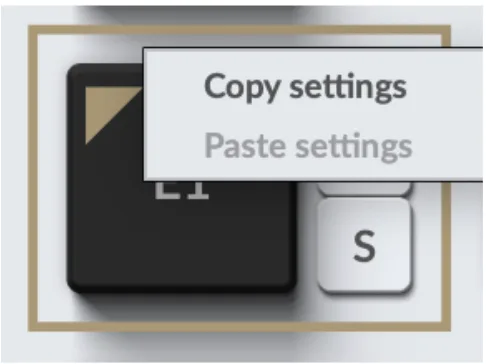
Copy all settings to another pad
- Right-click the source pad and choose Copy settings.
- Right-click the destination pad and choose Paste settings.
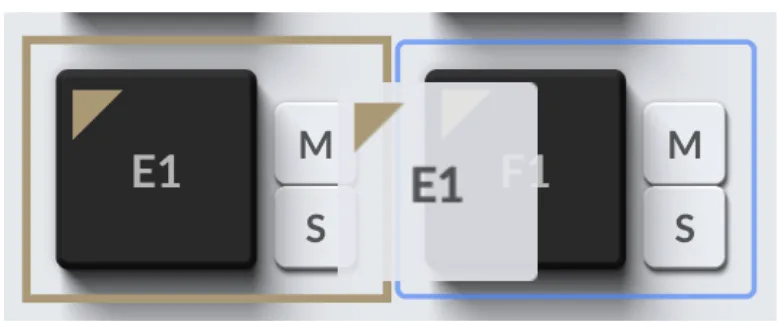
Swap pads
Reorganize the pads to your liking: grab a pad and drop it on another pad to exchange their positions.
Using VRAC+
Global controls
Global controls act on the whole kit at once, which makes them the ones to reach for while performing.
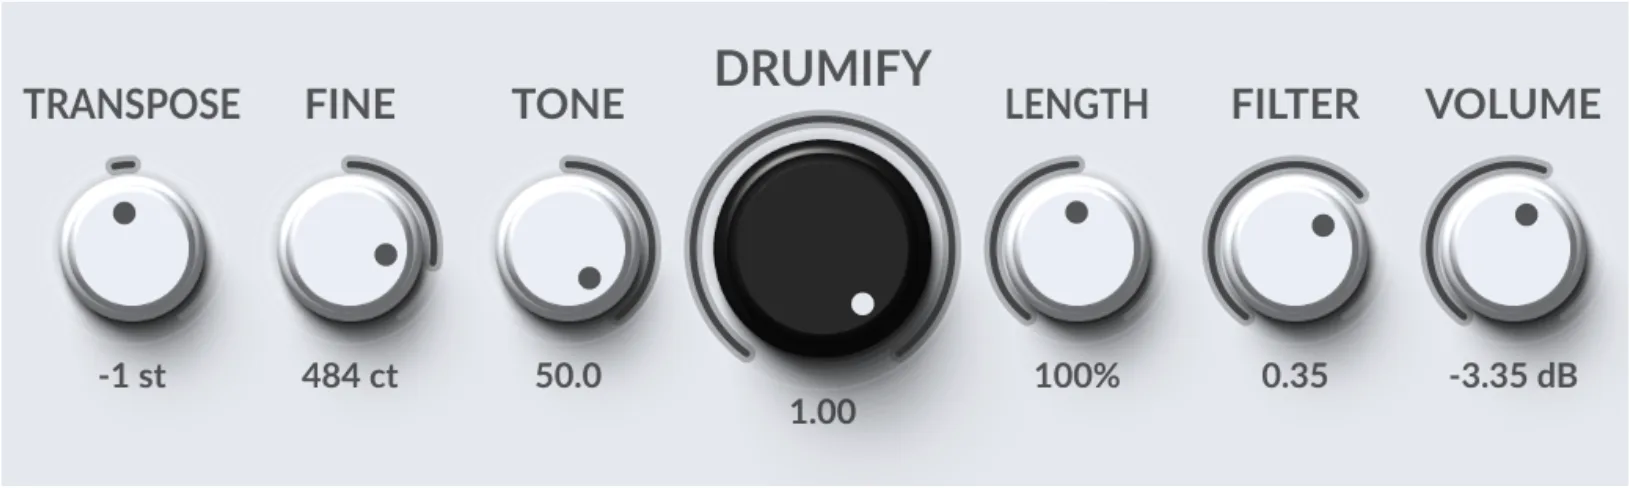
- Transpose
- Sample playback speed offset for all pads.
- Fine
- Fine pitch adjustment of the samples.
- Tone
- Tone Shift offset for all pads.
- Drumify
- Drumifier amount offset for all pads.
- Length
- Sample playback length offset for all pads.
- Filter
- Acts on the Drumifier model of each pad to produce a DJ-style filter. The center position leaves the sound unaffected. Turning counter-clockwise filters the high frequencies (low-pass); turning clockwise filters the low frequencies (high-pass).
- Volume
- Main output mix volume.
Using VRAC+
MIDI mapping & automation
Most parameters can be edited on screen, controlled via MIDI, and automated in your DAW.
On screen
Drag a control to change it. Use the mouse wheel to fine-tune, or hold ⌘ Cmd (Mac) or Ctrl (Windows) while editing.
MIDI
Right-click any parameter to access MIDI Learn and the mapping options. You can review all CC mappings from the Settings menu.
DAW automation
Parameters are exposed to your DAW, so you can automate them like any other plugin parameter.
Using VRAC+
Export your drum kit
Drag sounds out of VRAC+ straight into your DAW or a folder.
Export one pad
Drag a pad, or the Drag to export button, to a track in your DAW or to a folder (Finder on Mac, File Explorer on Windows) to export it as an audio file.
Export all pads
Export the whole drum kit as 16 separate audio files with the Drag to export all button, at the top right of the main window.
Using VRAC+
Presets
Presets and DAW sessions save all settings and sample file paths.
Save a preset

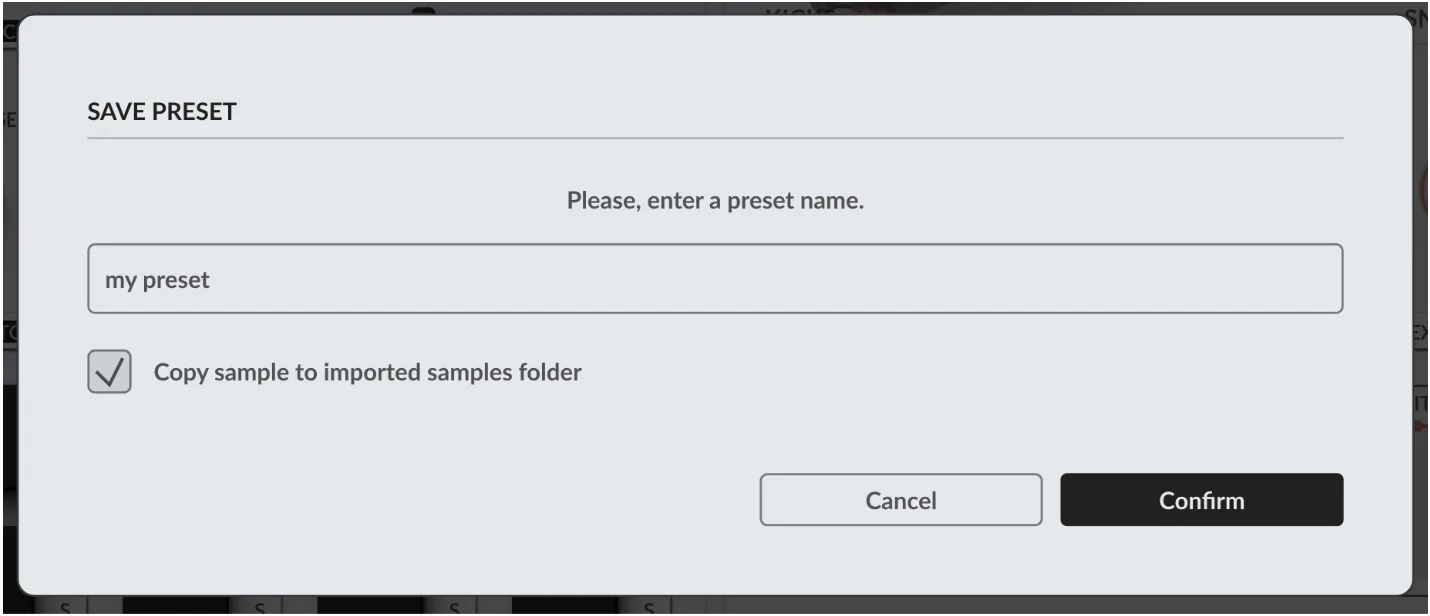
The processed samples are not saved within the preset. In the save dialog, tick Copy sample to imported samples folder to keep the source sample safe.
Preset packs
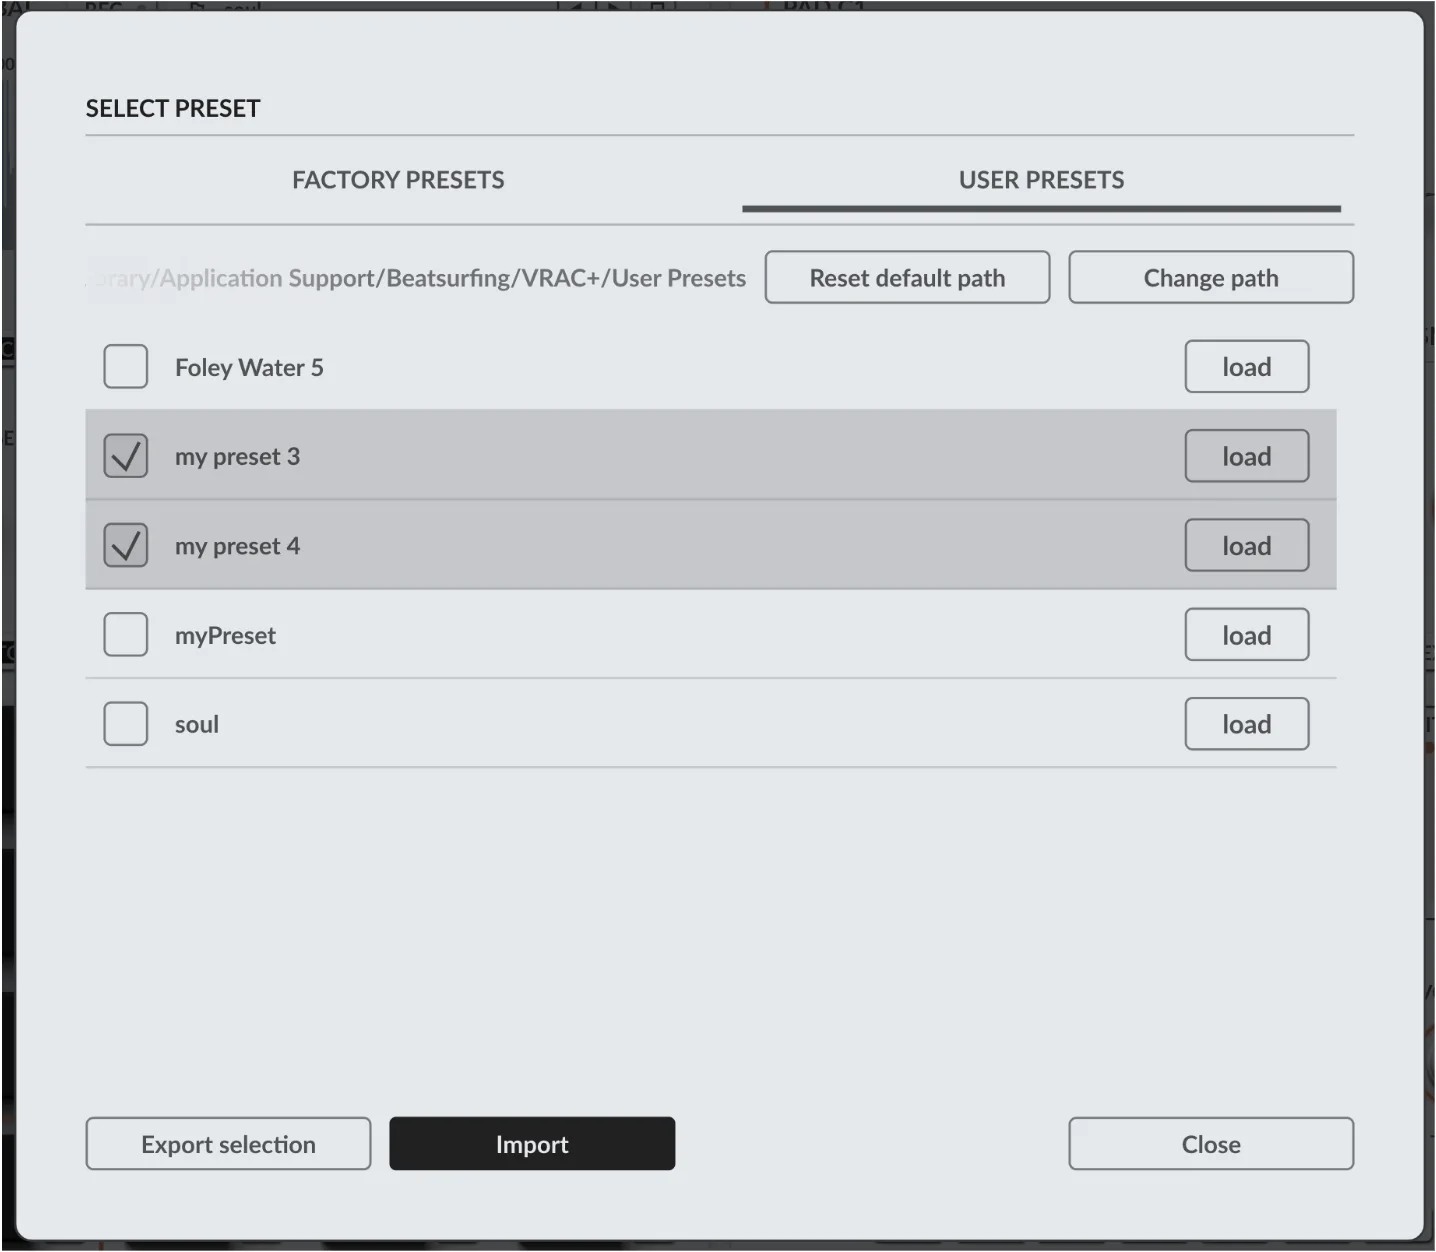
In the preset browser you can handle preset packs: a group of presets and the samples they use, which ensures compatibility and makes presets easy to share.
Export: select presets and click Export selection. The samples they use are copied from your disk and packed with them.
Import: the presets are added to your user presets and their samples are copied into your user imported folder. You can change the path of this folder in the Settings menu.
Using VRAC+
Settings
Open the menu from the button at the top left of the main window.
Menu entries
- Manage your license
- Deactivate your license if needed (see Activating & deactivating the license).
- Updates
- Download updates and read the changelog.
- CC mappings
- Set up CC mappings for any parameter.
- User Guide
- Open this user guide.
- Onboarding
- Restart the onboarding tour.
OpenGL
If you experience graphical issues or crashes, or want to reduce the CPU load a little (for example if you don't have a GPU), you can disable OpenGL, the graphics library used to render the map view. When it is disabled, you'll see simpler versions of these elements.
MIDI range
When VRAC+ receives MIDI notes outside the accepted range, a notification shows the expected range. You can turn this notification off here.
The default lowest note is C1 (36). You can set another base note here.
User folders
You can redirect the VRAC+ user folders: imported samples, recordings and presets. Each one can be reset to its default location at any time.
Upgrading from VRAC
If you started projects in VRAC and want to move them to VRAC+, import your VRAC user folder. Presets and preset packs made with VRAC are 100% compatible with VRAC+. VRAC can also load VRAC+ presets, but all advanced settings are ignored.
Help
Support
Can't find your answer in this guide? Everything else is in the BEATSURFING Help center.
Contact us
Thanks for supporting us. Don't hesitate to reach out with any questions or ideas: send us a message from the Help center.
The BEATSURFING team
 Login with Google